I took out the camera and put it on its tripod and set up the lights last night so I could take some pictures of this technique. But I found out that I only have room for 7 more pictures on my camera. I could download the stuff that's on the chip, but alas. I only have my DH's computer available at home since he's out of town and took the laptop. And his computer is all mysterious to me.
I could have brought the camera to work today and done it here, but I forgot. Also, once at home again I still wouldn't be able to upload the new pictures.
*Imagine a picture of me, annoyed, here.*
I could take pictures with my phone, but they'd be poor quality and I can't upload those either. It's an older phone and while I used to be able to send pictures with it, that feature has stopped working for some unknown reason. Arg!
My carefully considered opinion is that the best way for me to solve these technical difficulties is for DH to get a new laptop and for me to get a new phone.
But don't worry - pictures will happen eventually.
Thursday, September 30, 2010
Wednesday, September 29, 2010
Tunisian Crochet on Knitting Needles?
It should be possible. Not quick or efficient, but possible. I can't think of many reasons to do it. Maybe you don't have the right size Tunisian hook. Maybe you're into stunt knitting, which of course I am. It might also be useful if you want to do the kind of crochet where both ends of the needle are hooked. I haven't seen those in many sizes, but this would mean you could do it with a long double-pointed needle (DPN) or a circular needle.
Short Version:
In crochet, there's a point where after you yarn over (YO), you draw the loop through the stitch(es) that are on the hook. To do this with knitting needles you have to work a little harder. There's no hook on the end to hold that YO for you. So you use the left needle to bring the stitch(es) over the YO and off the right needle. This is similar to binding off. And that's all there is to it.
Long Version:
Here's what I'm thinking. I'm assuming you know how to knit and a little bit about how to crochet in the regular way. If not, you are very brave to have read this far.
Casting on:
For Tunisian simple stitch (TSS), you start with a foundation chain. If you have a crochet hook that's the size you want, you can certainly use it to make this chain. Everything else you do for TSS will involve having potentially many stitches on the hook, which is why Tunisian crochet hooks are longer. But when you create the chain you'll only have a maximum of two stitches on the hook to deal with. So a regular hook is fine.
But let's say all you have is knitting needles. You poor thing. You can also make a chain with these.
Start with a slip knot on the right needle. Yarn over (YO). Then use the left needle to bring the slip knot over the YO and off the right needle, just as you would for binding off. This leaves you with one stitch on the right needle. Then *YO again and use the left needle to bring the stitch over the YO and off the right needle*. Repeat from * to * until you have the number of chain stitches you want.
Foundation Row:
Now you can begin the foundation row. Skip one chain stitch and put your right needle through the bump on the back side of the next chain. YO then use the left needle to bring the stitch to the right of the YO over the YO and off the right needle, just as you would for binding off. You should have two stitches on your right needle after this.
Then *put your right needle through the bump on the back side of the next chain. YO then use the left needle to bring the stitch to the right of the YO over the YO and off the right needle, just as you would for binding off. You should have one more stitch on your right needle after this.*
Repeat from * to * until you reach the end of your chain. At this point the number of stitches on your right needle should be the same as your original number of chain stitches.
Since Tunisian crochet rows have a forward pass and then a return pass, this is only the first half of the foundation row. So now you start the return pass.
The first stitch of the return pass is unique. Basically, you chain one. To do this, do a YO, then use the left needle to bring the stitch to the right of the YO over the YO and off the right needle, just as you would for binding off. Ta da! You are now ready for the rest of the stitches of your return pass.
For the rest of the stitches, *YO then use the left needle to bring the TWO stitches to the right of the YO over the YO and off the right needle, sort of as you would for binding off*. The difference here is that you're bringing over TWO stitches, not just one. Repeat from * to * until you have only one stitch left on your right needle. Foundation row complete!
Additional rows:
For the forward pass of additional rows of TSS, skip one chain stitch and *put your right needle through the vertical bar in the row below. This bar will be to the left of the stitch currently on your right needle, not directly underneath it. (And this will make a lot more sense when I put up pictures and video.) YO then use the left needle to bring the stitch to the right of the YO over the YO and off the right needle, just as you would for binding off. You should have one more stitch on your right needle after this.* Keep repeating from * to * until you have just one more stitch to go.
For the very last stitch of the forward pass, you'll put your right needle through the vertical bar and the bar behind it (on the other side of the fabric). You do this to make the edge neat and sturdy. Then finish as you did for the other stitches in the forward pass.
The return pass for additional rows is just like the one for the foundation row.
Binding Off:
Guess what? The return pass IS binding off. Yup. In knitting you usually take one stitch over and off the needle, which is a little different from Tunisian crochet where you take two. But it accomplishes the same thing.
Which provokes all sorts of questions...
In regular crochet, you're constantly doing the equivalent of binding off. Single crochet, double, triple, whatever - the main difference seems to be how many times you wrap the yarn around the hook before you start taking the steps to bind off. If I used a Tunisian hook to do regular crochet, I could go way beyond triples, or even beyond double-triples. Octuple crochet stitch? Dodeca stitch? Kilo stitch? OK, maybe not that. But I think I could, if I had a long enough hook. Or needle. And enough patience.
Can I use regular or Tunisian crochet hooks to knit? Certainly the regular hook will be too short to do anything wider than, say, a handful of stitches. But could I do side to side knitting with a single-ended Tunisian hook? I know I can knit in the round with a double ended hook - that's just like knitting with circular needles that happen to have hooks on the end.
Are knitting and crochet the same thing? They're both just loops pulled through loops, whichever tools you use. Crochet has more of what I would call 'internal binding off,' which means if I messed up a stitch a number of rows past, I can't just drop a stitch, run it down to the messed up stitch, fix it, and then work back up the rows to fix the run.
Is that the difference between knitting and crocheting? The way the stitches interlock with one another? And what about naalbinding? I'm pretty sure naalbinding isn't just a giant (albeit complicated) slip knot the way knitting and crochet are. So what is it?
And if I start from the wrong end, knitting and crochet don't unravel like a slip knot - I have to draw the tail through each stitch to undo it. How does this directionality affect my idea of what knitting, crochet, and naalbinding are?
Well, I don't have answers yet. But I'll be pondering.
Tuesday, September 28, 2010
Sock Darning
Last night I followed the HJS Studio Tutorial and darned the red and orange socks I knitted for K. These socks are made with alpaca wool, which is not at all sturdy but is oh, so comfortable and warm.
She had a hole in the side of one and a worn spot in the side of the other. There was no wear at all in the heels or toes - weird! The darn came out kind of thick just as they described it in the tutorial, and my stitches are a bit wobbly. But I'm happy with it for my first try.
Here are the pics. Check out the wooden darning egg. It's a gift from my sister-in-law. It was her great grandmother's - how cool is that!
(P.S. Another re-run.)
Retro Computer, a.k.a. Raglan Sweater Wheel
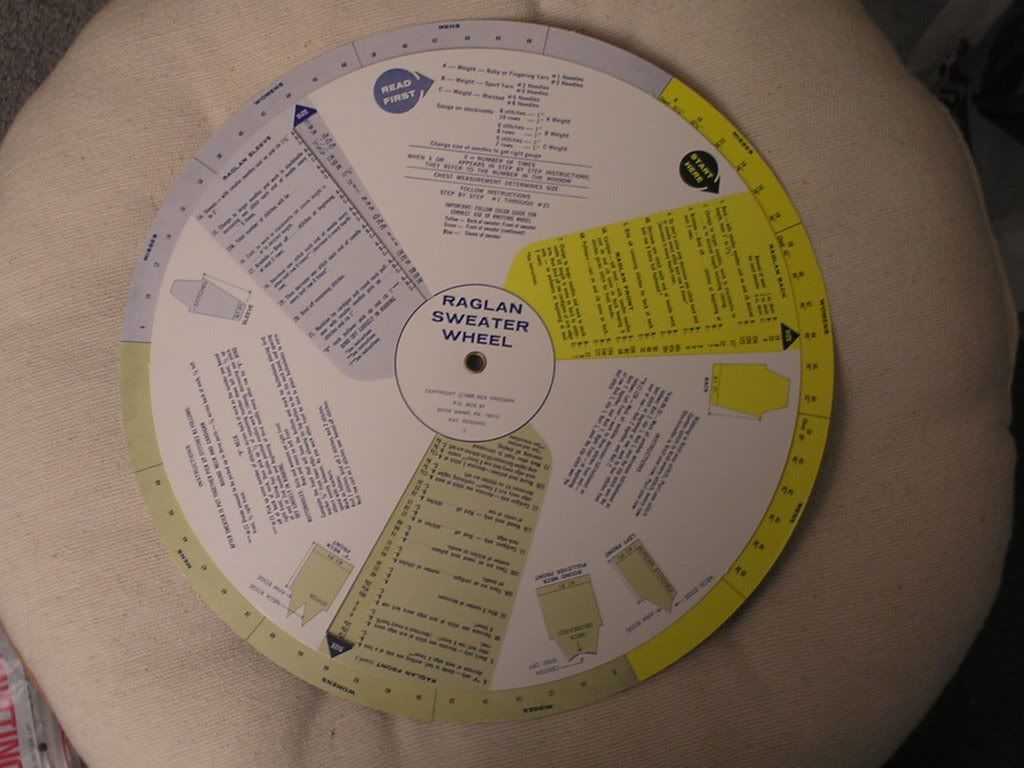
Having a mom who scours thrift stores as a hobby has its advantages. Check out this raglan sweater wheel she sent me:

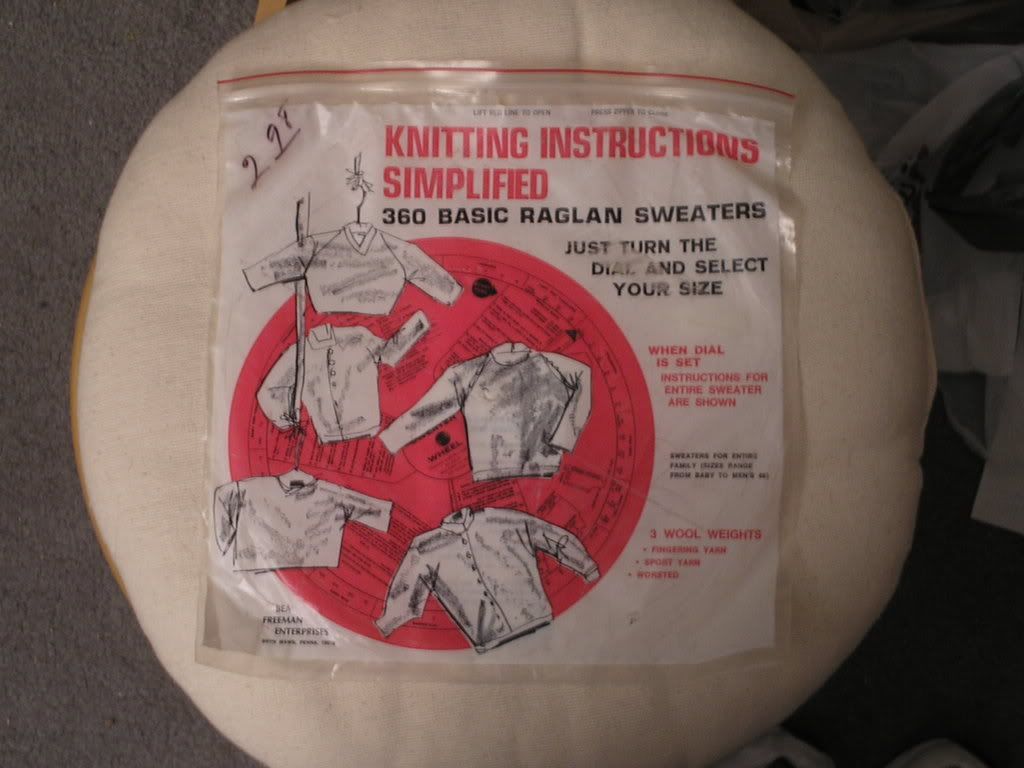
And here's its package:

It's a retro computer! It's made out of cardboard and its sole purpose is to show how to make sweaters, but it's a computer nonetheless. Makes me think of this: Antikytherea mechanism.
How is it supposed to work? It's made of 3 circles. The big circle is in the middle and two slightly smaller circles surround the big one. The big middle circle has columns of numbers (on both sides) that go in toward the center, and sizes around its edges. (One side is for kid sizes and the other for adults.) The smaller outer circles have cutouts that reveal the appropriate columns of numbers on the middle circle. These outer circles also have instruction text on them, and these instructions line up with the numbers revealed by the cutouts. All of these circles are connected in the center so you can rotate them with respect to each other.
So, you pick a size by lining up the cutouts with that size. The wheel is also color-coded so can easily match the sleeve instructions with the sleeve column, the sweater front with the sweater front column, etc.
One more thing - the wheel says, "Copyright 1969 Bea Freeman, P. O. Box 87, Bryn Mawr, PA. 19010, Pat. Pending." So here's to Bea Freeman, a computer designer of whom I had been unaware until now.
There are other sites that offer pics and descriptions - here are two of them: knittingfool.com and menwhoknit.com.
P.S. This entry is copied from a previous blog of mine. Think of it as a re-run. Or starter yeast.
And here's its package:
It's a retro computer! It's made out of cardboard and its sole purpose is to show how to make sweaters, but it's a computer nonetheless. Makes me think of this: Antikytherea mechanism.
How is it supposed to work? It's made of 3 circles. The big circle is in the middle and two slightly smaller circles surround the big one. The big middle circle has columns of numbers (on both sides) that go in toward the center, and sizes around its edges. (One side is for kid sizes and the other for adults.) The smaller outer circles have cutouts that reveal the appropriate columns of numbers on the middle circle. These outer circles also have instruction text on them, and these instructions line up with the numbers revealed by the cutouts. All of these circles are connected in the center so you can rotate them with respect to each other.
So, you pick a size by lining up the cutouts with that size. The wheel is also color-coded so can easily match the sleeve instructions with the sleeve column, the sweater front with the sweater front column, etc.
One more thing - the wheel says, "Copyright 1969 Bea Freeman, P. O. Box 87, Bryn Mawr, PA. 19010, Pat. Pending." So here's to Bea Freeman, a computer designer of whom I had been unaware until now.
There are other sites that offer pics and descriptions - here are two of them: knittingfool.com and menwhoknit.com.
P.S. This entry is copied from a previous blog of mine. Think of it as a re-run. Or starter yeast.
Subscribe to:
Comments (Atom)